Basic Equipment For Viewing the Night Sky: Beginner's Guide
Begin your journey into Noctourism with essential stargazing gear for beginners. Explore basic equipment for viewing the night sky effectively, from binoculars to specialized optics.
EQUIPMENT GUIDES
5 min read
Have you ever looked up at the twinkling stars and wished you could see just a little bit more? The vastness of the universe is mesmerizing, and while advanced technology lets us peer deeper into the cosmos, getting started in astronomy doesn't require complex or extremely expensive gear.
At Lipton Travel, we believe the most profound journeys begin with simple steps—and that applies to the ultimate destination, the night sky. In fact, 2026 is an incredible year for stargazing as we approach the peak of the 11-year solar cycle, promising dynamic views and intense celestial events like the potential for increased auroral activity.
If you’re ready to begin your cosmic journey, here is a guide to the most essential, basic equipment for viewing the night sky, strictly avoiding Amazon links to focus on specialized sources and experiences.
Your Most Crucial Astronomy Tool: Your Eyes
The absolute first piece of equipment you already possess: your own eyes. In a world of digital screens, our visual perception has often become confined. To view the night sky successfully, you must master the art of dark adaptation.
Human eyes can take 20-30 minutes to fully adjust to the dark, a process that dramatically improves your sensitivity to faint light. Even a split second of exposure to bright white light can ruin your dark adaptation.
What You Can See With the Naked Eye:
Constellations: Identifying the primary star patterns that define our skies.
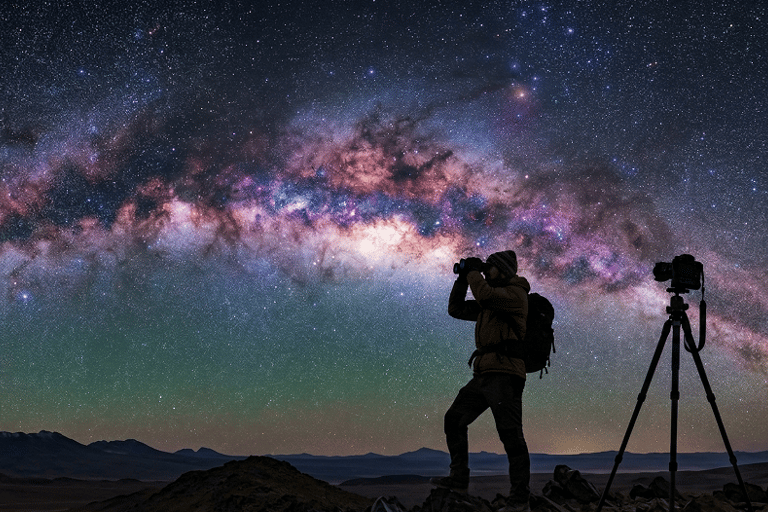
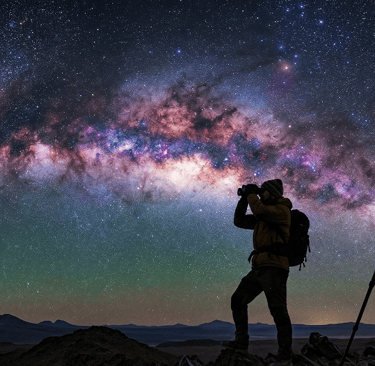
The Milky Way: Seeing our home galaxy as a faint, luminous cloud of light.
Planets: Venus (brilliant evening star), Mars (distinctly red), and Jupiter (bright) are easily identifiable.
Meteors: Random shooting stars are frequent, especially during minor meteor showers.
Binoculars: The Perfect Starter Optics
If you want to magnify the night sky, we strongly recommend starting with a quality pair of binoculars. Unlike telescopes, they are incredibly easy to use, intuitive to point, and relatively inexpensive for the performance they provide.
A pair of binoculars essentially uses two telescopes side-by-side, gathering more light than your eyes alone. This wide-field of view is perfect for locating vast objects and scanning the starry horizon.
Choosing the Right Astronomy Binoculars:
The most common standards for basic astronomy are:
7x50: This offers excellent light gathering (50mm aperture) with lower magnification (7x), resulting in a bright image and less shake, perfect for hand-holding.
10x50: Slightly higher magnification with the same light gathering capability. Images will be larger but harder to hold steady.
8x40 or 8x42: Good all-arounders that balance magnification, brightness, and weight.
For steady viewing, look for models with large, bright, multi-coated optics and an objective lens aperture of 40mm or more. You can find specialized astronomy binoculars from reputable optics dealers like High Point Scientific
Mapping the Sky: Star Charts and Planispheres
The stars may seem static, but they constantly rise and set throughout the night. To know what is visible at your location, date, and time, you need a map.
A planisphere is a simple yet brilliant tool—a physical wheel that you rotate to align the date and time. It then shows you the exact constellations visible in your sky. They are durable, require no batteries, and are the ideal companion for beginners [Placeholder Link: Astronomically Accurate Planispheres].
Printed star charts are also excellent for deep sky exploration. They can be found in specialized astronomy books or sometimes as free monthly downloadables.
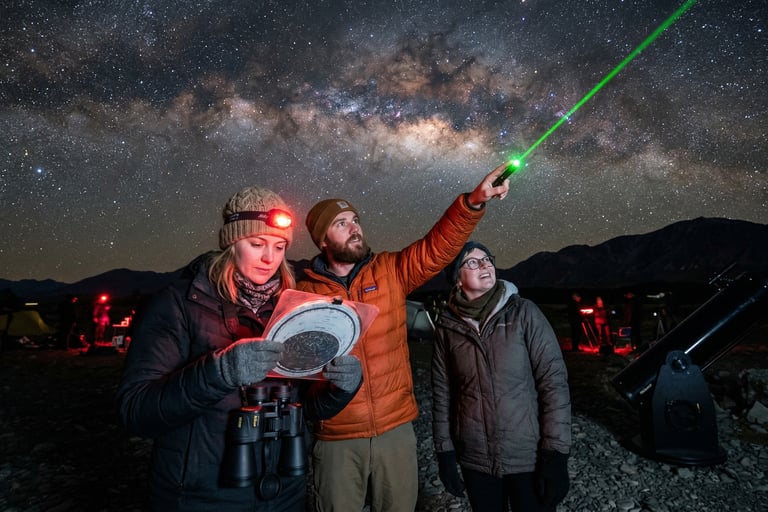
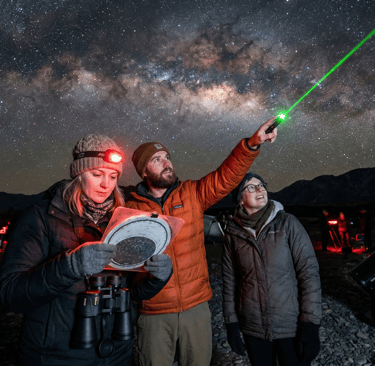
Red Light: Preserve Your Dark Adaptation
White light is the enemy of dark-adapted eyes. But you still need light to read your star charts or adjust your equipment. The solution is using red light.
Red light is far less disruptive to the chemicals your eyes use for dark adaptation. You can purchase dedicated red-light flashlights or headlamps, or even create a temporary one by covering a standard flashlight with red cellophane. We advise prioritizing comfort by using a headlamp so your hands remain free.
How to Stay comfortable when Viewing:
Dress in Layers: It gets cold quickly when you stand still, even in spring or summer. Layer up with insulating clothing.
Stay Hydrated & Fueled: Bring water, snacks, and perhaps a warm drink in a thermos.
Choose the Right Night: Stargazing is dramatically impacted by the lunar cycle. For deep sky views, plan your observations during the new moon phase, when the sky is darkest.
Going Deeper: Should You Buy a Telescope? (Wait First!)
The temptation to rush and buy the largest telescope you can afford is immense. We urge restraint. While telescopes are incredible tools, their learning curve is steep, and a poor-quality scope is a recipe for frustration.
Cheap "department store" telescopes often have wobbly mounts and inferior optics. A wobbly image is useless. A good entry-level telescope can cost upwards of $400, and a smaller reflector, like a 114mm to 150mm Dobsonian, is a robust and excellent starting point, often better than complex, small-aperture motorized scopes.
If you are eager to use a telescope, we recommend starting with a guided experience. You can find exceptional guided telescope viewing tours that provide access to world-class instruments and expert instruction at Viator. This lets you learn the basics before committing to your own.
Mobile Apps and GPS: Stargazing in the Palm of Your Hand
In 2026, technology is incredibly helpful for navigating the night sky. Mobile apps are now a standard part of any beginners astronomy gear toolkit. Using your phone’s GPS, magnetometer, and camera, these apps allow you to point your phone at the sky and see an augmented reality map identifying constellations, planets, and even satellite passes.
Excellent free and paid options exist, such as Stellarium (open-source) and SkySafari.
CRUCIAL WARNING: Be aware that using your phone, even with a dark mode or red light filter, can still negatively impact your dark adaptation. Always set your phone's brightness to its minimum, use the in-app night modes, and try to look at your phone only when necessary.
Finding a Truly Dark Sky
Finally, the single most impactful piece of equipment isn't something you buy; it's where you choose to observe. Light pollution is the greatest barrier to enjoying the night sky. You can have the most advanced equipment, but you will see far more with a simple pair of binoculars from a truly dark location than you will with a telescope from a brightly lit city.
The International Dark-Sky Association (IDA) certifies "Dark Sky Sites" globally—locations dedicated to dark-sky preservation. To see the Milky Way in all its glory, prioritize traveling to a location with minimum light pollution.
Frequently Asked Questions
Can I see nebulae and galaxies with basic binoculars?
Yes! Many of the brightest objects, like the Orion Nebula (M42) and the Andromeda Galaxy (M31), are easily visible with 10x50 or even 7x50 binoculars. They will appear as faint, fuzzy patches of light, rather than detailed colored structures seen in photographs.
Why does everyone recommend red light?
White light, especially blue light from screens, instantly triggers the "washout" of a chemical called rhodopsin in your eyes, which is essential for low-light vision. Using red light helps prevent this while still allowing you to navigate.
Is it necessary to go to a dark sky park?
While you can see the brightest stars and planets from your city backyard, a dark sky location is transformational. Objects like the Milky Way and faint nebulas require a dark background to be seen at all. A dark sky site will reveal thousands more stars than a polluted location.
The Lipton Night Sky Checklist
Give Your Eyes Time: Wait 20-30 minutes for full dark adaptation.
Locate the Main Constellations: Use a planisphere or app to find Ursa Major (Big Dipper) or Orion as your anchor points.
[Scan with Binoculars: Slowly scan the area of the Milky Way or a known constellation. Look for "fuzzies."
Use Red Light Only: Protect your dark adaptation whenever you need illumination.
Prioritize Comfort: Dress much warmer than you think you need.
Questions or thoughts? Reach out anytime. Email Mike at info@liptontravelcom
© 2025. All rights reserved.